
ICIS excel plug-in*
*Available for ICIS ClarityTM subscribers only
By downloading the ICIS Excel Plug-In you confirm that you agree to our terms and conditions
Note: You need to be subscribed to ICIS pricing information to use the Excel Plug-in. Your login details will be the same as for your ICIS subscription. If you have any issues downloading or installing please contact support@icis.com
Install instructions ICIS Excel Plug-In
- Download the program accessing the link above
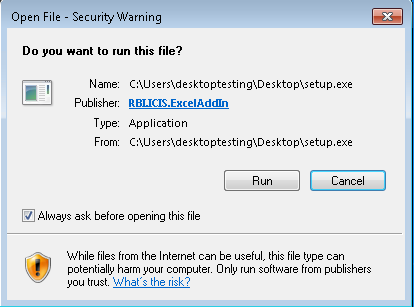
- Click
 to verify if the prerequisites are installed on your machine.
If any of the prerequisite are not installed, then the Installer, by default installs it on your machine, prompting a message for you to accept the new components.
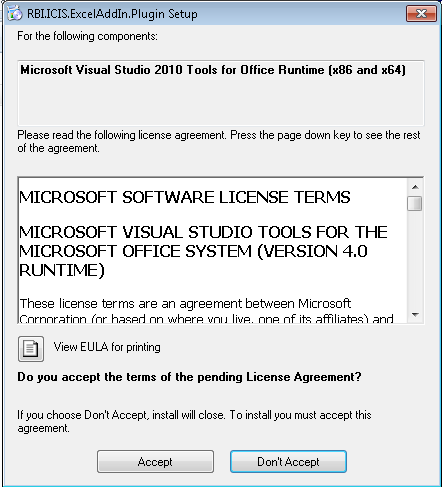
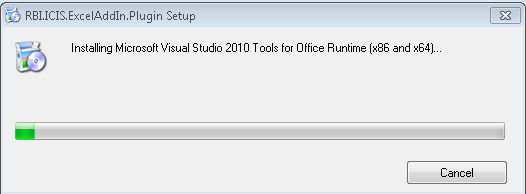
3. Click ![]() to start installing the components part of the prerequisites and then continue installing the plug-in.
to start installing the components part of the prerequisites and then continue installing the plug-in.
Click Don’t ![]() during the installation if you choose to stop installing the plug-in.
during the installation if you choose to stop installing the plug-in.
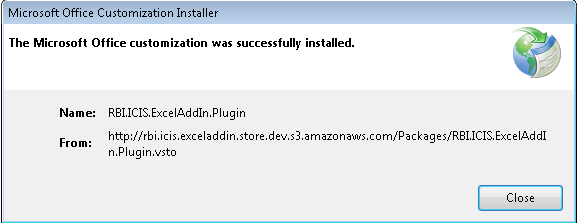
4. Once the Excel-Plug-in is successfully installed, the message dialog box appears.
5. click ![]() to close the message box.
to close the message box.
6. Open Microsoft Excel and start using the ICIS Excel Plug-In If the ICIS tab is not displayed after successful installation, follow the steps below to add the ICIS tab to the Excel ribbon.
- Click the File menu to get the list of sub-menu options.
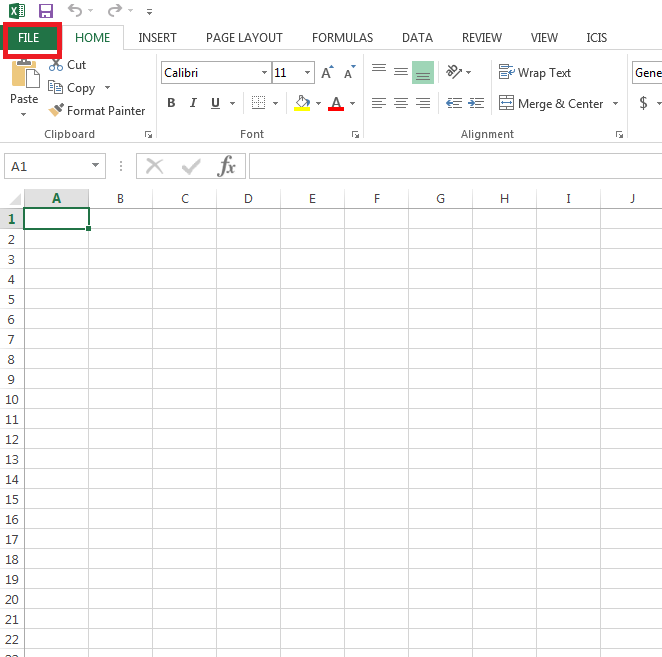
2. The list of sub-menu options is displayed.
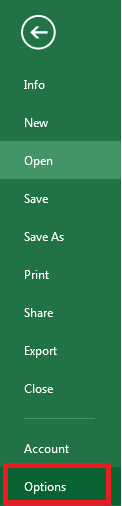
3. Click Options. The list of Options available are listed.
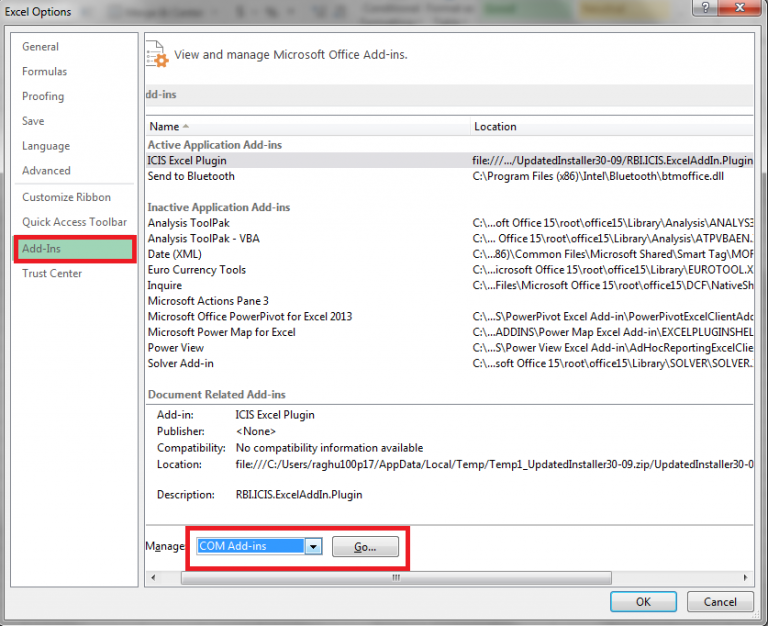
4. Click Add-ins. The list of Microsoft Office Plug-ins is displayed.
5. From the Manage drop-down, select COM Add-ins and click Go. The COMS Add-ins box displays the available Add-ins.
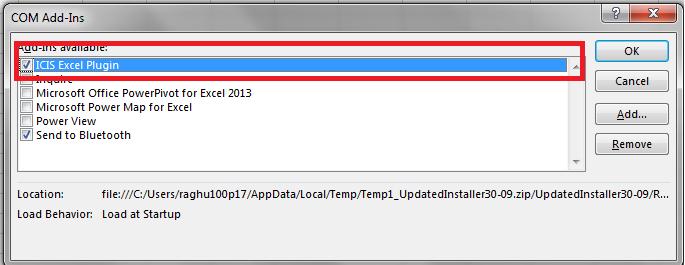
6. Select ICIS Excel Plug-In and click OK.
Note: The updates are checked automatically and latest updates are installed at Microsoft Excel start-up, so that you are always using the latest version of the ICIS Excel Plug-In.
Support & feedback
Support & feedback If you have any issues with the ICIS Excel Plug-In please feel free to contact us on:
Customer support: support@icis.com
Asia & Middle East: +65 6588 3955
Europe & Africa: +44 20 8652 3335
US & Canada: +1 888 525 3255
Americas: +1 713 525 2613


Need Help?